One of the most annoying errors that I’ve faced during my projects is when my Arduino code is not uploading. Many times the reason behind each error was different. After troubleshooting this error over and over, I thought to pen down my experiences and share them in a helpful post.
So, here’s 7 reasons your Arduino code not uploading? The most common reasons your Arduino code is not uploading are:
- Errors in the connection
- Wrong port selection
- Erroneous code
- Drivers not installed
- The board needs resetting
- Presence of a short circuit
- Your board is drawing too much current
As you can see, the reason could be anywhere between a connection error in the circuit to a syntax error in the program. Meaning the problem your Arduino code is not uploading could be happening in the hardware or software. So, let’s check at the reasons in detail and give the right solution to each of these problems.
I wrote a step-by-step guide to upload code to Arduino, if you need a bit more help, check it out here: chipwired.com/uploading-code-arduino
Here’s Why The Arduino Code is not Uploading:
1. Errors in The Connection
One of the reasons why your Arduino code might not be working is because of errors in the connection between the Arduino board and your PC.

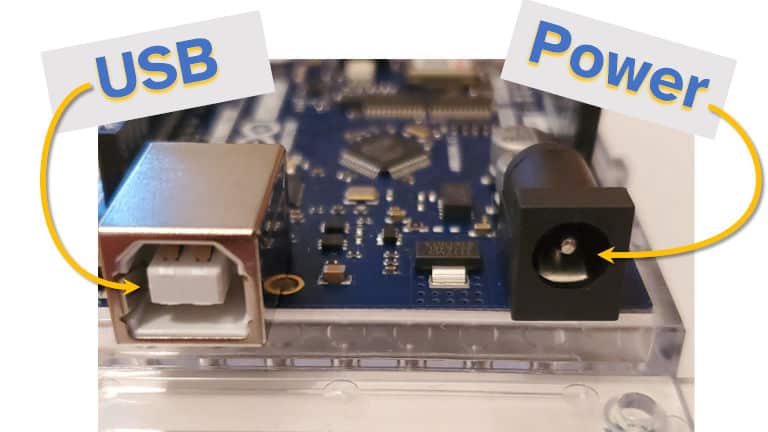
One can use a type A/B USB cable to connect the Arduino UNO and MEGA boards via the USB port of a computer, which is OK. But, since we can use such cables for many other applications like charging our mobiles, they can easily give an error.
Moreover, another error in connection could be due to a fault in your computer’s USB port. If it’s not working, your computer won’t recognize the Arduino board; hence, you won’t be able to upload your Arduino code.
Similarly, a damaged Arduino USB port could cause the same problem.
I wrote a step-by-step guide for uploading code to Arduino, which includes details on plugging in the right cables. Check it out here: chipwired.com/uploading-code-arduino/
2. Wrong Port Selection
The port number through which Arduino IDE uploads the program to the board plays a significant role. Before uploading your code, make sure that the port number selected by your Arduino IDE matches the port number at which you connect your Arduino board.

To do so, connect your Arduino board to your PC and open the Arduino IDE. Then, look at the lower right side of the window to find out at which port is Arduino connected. An example text written on the blue stripe at the bottom of the window could be “Arduino UNO on COM17”. This line indicates that your Arduino UNO board is connecting through the serial port COM17, and that’s where the Arduino IDE should upload the code.
How to check if the Arduino IDE is selecting the right port?
- Click on the “Tools” menu present on the top left side of the Arduino IDE window.
- In the drop-down menu, hover over the “Ports” menu.
- Then select the port where your Arduino board is connected.
If it is already selected (you’ll notice a small tick beside it), that means this isn’t the reason why your Arduino code is not uploading.
So, let’s move on to the next possible problem.
3. Erroneous Code
The best lessons are the ones that you learn from your mistakes. If you’re unable to upload your code, then you need to check for errors in your program and correct them.
It’s entirely OK to make mistakes while writing an Arduino code (and any other code to be honest), so if you’re one of those people who end up with a list of errors after writing a program, don’t worry!
Arduino IDE comes with a built-in compiler just like many other programming platforms. This compiler is responsible for checking errors and uploading an error-free program to your Arduino board.
After the compiler checks your program, it will show you the list of errors at the bottom of the screen, which you can quickly identify and correct.
4. Drivers Not Installed
Every software on your computer needs a driver to run because it enables the operating system to communicate with that specific software. Similarly, Arduino also requires drivers to function correctly.
Your Arduino code might not be uploading because of incompatible or outdated drivers or directly no drivers installed at all.
To check whether you have the correct drivers installed on Windows, open the device manager present in the control panel of your PC. You’ll find your Arduino board listed.

To update the Arduino driver to the latest version available, right-click on the name of your Arduino board and click on “update driver.”
After updating the Arduino drivers, go back to your Arduino IDE and check if now it recognizes your board through the “Tools” menu, as explained previously.
Installing the proper drivers and keeping them updated should solve this problem, and you’ll be able to upload your code without any problem.
5. The Board Needs Resetting
Another reason why your Arduino code is not uploading might be that your board has been running for too long and needs a break. All it needs is a push on the tiny reset button embedded in it.

If this doesn’t work, then check out this interesting article showing 5 Simple Ways to Reset Arduino.
In case the reset button on your Arduino board is inaccessible (due to external shields), then you can try connecting a push button as a reset button, as shown in this tutorial.
6. Presence of A Short Circuit
A short circuit on your board can occur if you’ve joined the 5V pin to the ground pin. This error usually happens when working on a project that has too many jumper wires going here and there, one can easily make the mistake of connecting the power pin to the ground pin. When this happens, your PC automatically disconnects your Arduino board from the port, and therefore, you won’t be able to upload your code.
If you were able to upload your code before making those changes in your project circuitry, then a short circuit could be the culprit behind this upload error.
Disconnect your Arduino board from the computer and check all the connections involving the 5V and GND pins. If you find that the 5V and GND pins wee accidentally shorted, rectify the fault and try uploading your code again.
7. Your Board Is Drawing Too Much Current
Are you using a heavy load in your Arduino project? Have you calculated the maximum current requirement of your project?
If your Arduino board is drawing more current than a computer can provide, you need to limit your project’s current requirements because the computer will automatically disconnect your board from the port whenever this happens. You won’t be able to upload your code.
So, make sure that your Arduino is not drawing too much current from your PC.
To read more about the power and current limitations of Arduino, check this short article.
What’s Next?
If you have successfully managed to identify the reason why your Arduino code is not uploading, then you must move on to the next step; troubleshooting.
In case an error in connectivity was the culprit in your case, then you need to either buy a new USB cable or repair your damaged USB port. To avoid inconvenience in the future, you can buy a genuine USB cable designed specially for Arduino, from the official Arduino website. Otherwise, you can buy it from an electronics store, but make sure that the store offers an exchange policy in case the cable is not compatible with Arduino.
Other solutions include selecting the right port from the IDE, updating drivers, and looking for errors in your code and project circuitry. These solutions will solve your problem and will allow you to upload your code without any hassle.
A good practice is always to double-check your code and connections in your Arduino circuit.
Checking the port and drivers before you start writing your code will also save you from uploading errors. So, make sure to keep these points in mind when working on your next Arduino project.
Happy coding!
To Learn More Why Your Arduino Code is not Uploading:
- Why Won’t My Code Upload to Arduino? (moretech.co).
- Why I can’t upload my programs to the Arduino board? (arduino.cc)
