Utilising sensors effectively is at the core of many Arduino projects. Using an Arduino for robotics, IoT, cloud connectivity, and smart devices all rely on having sensors connected to the Arduino.
This ultimate list of Arduino sensors is intended to give you an idea of the variety of sensors that are available, as well as the typical costs involved and how the sensors can be connected to an Arduino. I wrote this guide as an overview to inspire; check out the links to example sensors for more technical details on how to build circuits that work with each sensor.
Sensors suitable for Arduino typically cost $4 to $30. Most sensors for use in Arduino projects can be purchased for under $10. Sensors for use in Arduino projects are typically less accurate than those which might be used for industrial applications. While more expensive sensors can work with Arduino, their uses are typically more niche than what I’ve found useful for people working with Arduino projects at home.
Arduino sensors are typically used to:
- Collect data for analysis and storage (e.g. cloud)
- Collect data to feedback for control
Most sensors connect to the Arduino’s analog input pin, and their data can be read by reading that pin. Some sensors also offer a digital interface which can be connected to using the Arduino’s SPI, UART, or I2C libraries.
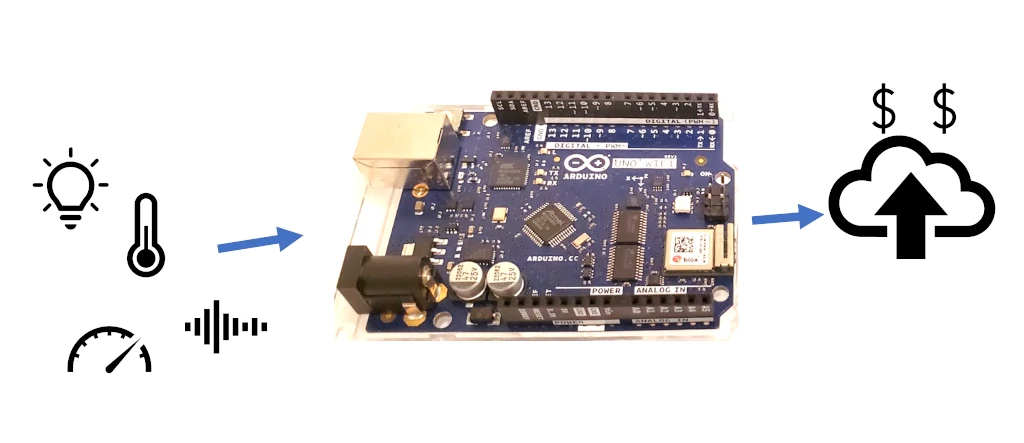
Collecting data is also a way to make money with Arduino. I covered this in my recent guide on how you can make money with Arduino. If you’re interested in this, check it out here: chipwired.com/make-money-with-arduino/
Soil Moisture
A soil moisture sensor is used to measure the moisture of soil around plants. The sensor has two probes which are inserted into the soil. Current is run through the probes to give the sensor a measurement of the resistance between the two probes: More resistance means dryer soil.
Typical cost of soil moisture sensor: $4 – $5. An example of a soil moisture sensor can be found here.
Soil moisture sensors are typically connected to the analog pin on an Arduino.
Air Flow
Air flow sensors detect how fast air is flowing through the sensor, typically measured in liters per minute. These sensors typically work by measuring the change in temperature over a surface due to the flow of air over that surface. They can also work using lasers.
Air flow sensors are big business as they can be used in industrial manufacturing settings, mining, automotive and safety critical applications (e.g. planes). They can also be used to detect speed (though I reckon wheel rotation – see Hall Effect sensor below – is a better way to measure speed for an Arduino project).
Analog air flow sensors are available, the output voltage corresponds to the air flow rate.
Typical cost: $80 – $1000+. Cost depends on the speed of air flow you expect (very slow and very fast are expensive) and the accuracy with which you need the speed measured. An example can be found here.
Color
Color sensors detect the visible color of an object, typically as a combination of red, green, and blue intensities. This matches the way a computer stores colour as a combination of red, green, and blue (RGB).
Color sensors are useful in:
- Sorting objects, imagine colored tags attached to objects and your Arduino is able to sort them,
- Paint color sensing, to compare paint colors between walls (I studied with someone who turned this into a business),
- Ambient light sensing,
- Robotics.
Color sensors work by using an array of photo detectors with red, green, and blue filters. This is similar to the way a digital camera works. A color sensor will typically output the intensity of each of these colors as a digital or analog signal which can be read by the Arduino.
Typical cost of color sensors: $5 – $10. An example can be found here. In my money making with Arduino guide, I also talk about how someone I studied with turned a color sensor into a product which they sell; if you’re interested in reading that guide, check it out here: chipwired.com/make-money-with-arduino/
Connection of a color sensor to an Arduino is typically accomplished using one of the digital inputs. Some color sensors may give an analog output, in which case this can be measured to determine the intensity of color corresponding to that pin.
Magnetic field (Hall Effect)
Hall effect sensors detect magnetic fields using the hall effect. The Hall effect is where a voltage is realised across an electrical conductor in relation to current flowing through the conductor and a present magnetic field.
Hall effect sensors are good for measuring:
- Power, as you don’t have to cut into the circuit when using a Hall effect sensor,
- Wheel rotation – place a magnet on a wheel, then measure how often the magnet goes past the Hall effect sensor,
- Detecting through an air gap – sometimes it can be important to separate circuits with an air gap, the Hall effect can be one way to transit across this air gap.
Typical cost: $2 – $50. An example Hall Effect sensor can be found here.
Most Hall effect sensors are connected to an analog pin on an Arduino.
Tilt
A tilt sensor detects when the board its attached to is not upright. This can be useful for knowing if something is unstable or has fallen over.
Tilt sensors typically work by having a small metallic ball inside a housing. If the sensor is tilted, the ball will roll off metal contacts breaking the circuit and indicating that the board is no longer upright.
An inclinometer can measure the angle of tilt by using the effect of gravity on a tiny mass suspended within the sensor.
Typical cost: $2 – $200. A simple tilt sensor that only detects whether or not the board is upright can be purchased for as little as $2; a more complicated inclinometer can cost hundreds of dollars. An example tilt sensor can be found here.
Tilt sensors are typically connected to the digital pin, while inclinometers can be digital or analog.
Temperature
Temperature sensors use the difference in electrical behaviour of metals over different temperatures to convert temperature to voltage. In a temperature sensor, two different types of metals are placed close to each other. A voltage difference will arise between these metals; this voltage difference changes with temperature.
Infrared temperature sensors are an alternative technology which measure the frequency of light coming back from an object.
Temperature sensors are useful for measuring the temperature in a room or space, or the temperature of an object. Example Arduino projects that use temperature sensors include:
- Weather station
- Monitoring device (to activate cooling if something gets too hot)
- Home automation
Typical cost of temperature sensors: $2 – $7. This is the range I would expect to pay for an Arduino temperature sensor. An example of such a sensor can be found here.
The analog pin on an Arduino is typically used to connect a temperature sensor. Some sensors also output a digital signal.
Humidity
Humidity sensors measure the humidity in the air. The most common humidity sensors I’ve seen measure humidity using capacitive or resistive means. Capacitive applies a voltage to one of two electrodes which have a compound between them, the value of the capacitance changes based on humidity. Resistive uses a a special type of resistor which becomes more or less resistive based on humidity.
Typical cost of humidity sensors: $4 – $5. An example humidity sensor can be found here.
Common humidity sensors connect to a digital pin on an Arduino.
Carbon dioxide
Carbon dioxide sensors measure the quantity of carbon dioxide in the air around the sensor. Measuring carbon dioxide in the air is good for understanding air quality, and understanding sources of carbon dioxide in an enclosed area (e.g. a room).
These sensors typically work by emitting and measuring specific frequencies of infrared light as it passes through air (inside the sensor).
Typical cost of carbon dioxide sensors: $80 – $1000. Carbon dioxide sensors are typically used in industrial applications, which is why they’re so expensive. An example of one which can work with an Arduino can be found here.
The example sensor I linked uses the UART digital communication protocol, it is compatible with Arduino (either built in or via shield). Other carbon dioxide sensors can connect to an analog pin and produce a voltage that varies with carbon dioxide concentration.
Dust
Dust sensors are used to measure the amount of dust in breathable air. This can be useful for measuring indoor air quality, and how well air cleaners, purifiers, or air conditioners are working at reducing dust. Dust sensors can also be used as an alternative type of smoke detector.
Dust sensors typically shine infrared light through some air and detect interference in the light. The less light that shines through to the other end, the more dust (or smoke) there is in the air.
Typical cost of dust sensors: $10 – $50. Example dust sensor, click here.
An Arduino can receive the information from a dust sensor using a digital communication protocol such as SPI or I2C.
Flame
Flame sensors offer an alternative way of detecting fire. Flame sensors work by sensing light, heat, smoke, or a combination of these as generated by fire. Light sensed is typically in the ultraviolet or infrared range. It’s also possible to sense fire using video cameras and AI.
Typical cost of flame sensors: $2 – $100. Cheaper sensors may only offer one detector and only output an alert when there is a fire. More expensive sensors can output more information about the fire.
An Arduino can have a flame sensor connected using a digital or an analog pin.
Air Pressure
Air pressure sensors are measure the pressure of air in the vicinity of the sensor. Air pressure sensors may also be referred to as altimeters (for measuring altitude) or barometric sensors (strictly air pressure).
Often a barometric and temperature sensor can be combined to provide the altimeter function (i.e. to detect what the altitude is).
Typical cost: $20 – $40. Cheaper sensors only measure air pressure, while more expensive sensors include an altitude output.
Air pressure sensors typically connect to the analog pin, however sensors that include an altitude output can often provide digital interface, such as SPI (which Arduino supports).
Ultraviolet Light
Ultraviolet light sensors are designed to sense light in the UVB and UVA spectrum (e.g. 240-370nm wave length of light). UV light sensors can be used for fire detection, sunlight exposure, and in medical applications.
Typical cost: $13 – $400. An example UV sensor can be found here.
Cheaper sensors have an analog output which connects to the analog pin on the Arduino. More expensive sensors have digital interfaces which can connect to the Arduino using SPI or UART.
Force
Simple force sensors detect when force is applied to an area of the sensor. This force can be applied by human touch, or by an object pressing against the sensor. Force sensors can also be used as a type of touch sensor (covered more below).
Force sensors work by increasing the resistance of the sensor as pressure is applied to it. This is an analog input which can be connected to the analog pin of an Arduino.
Typical cost of force sensors: $5 – $15. An example force sensor can be found here.
An Arduino can receive information from a force sensor using an analog pin.
Touch
Touch sensors detect when something touches the sensor.
Touch sensors are different to force sensors in that:
- Touch sensors do not typically require much force to register a touch,
- Touch sensors cannot typically measure the amount of force that has been applied.
A touch sensor works by measuring the capacitance of the sensor, which changes when something touches it. They are similar to a mobile phone screen, though the touch sensors that work with Arduino are much simpler and cheaper.
Typical cost for touch sensors: $5 – $10. An example touch sensor to use with Arduino can be found here.
Cheaper touch sensors output an analog voltage which can be connected to the analog pin on an Arduino.
Proximity
A proximity sensor detects when a corresponding plate is close (in proximity) to the sensor. I have a proximity sensor as part of my door latch. The lock uses a proximity sensor to detect when the door is closed, thus knowing when to turn the bolt to lock the door.
If you want to detect when a person or object is close (in proximity) to a sensor, check out the motion and distance sensors below.
Typical cost for a proximity sensor: $5 – $10. An example of one which works with Arduino can be found here.
These proximity sensors work in a similar fashion to relays, so they can connect to an output from your Arduino and then read back in via an input (or connected to the voltage supply and read back in via an analog pin).
Stretch
A stretch sensor is a tool used to measure the amount of stretch force applied to it. Think of a rubber cord that you can pull on, with the output of the sensor being the amount of force you applied in the pull.
Stretch sensors are typically a conductive rubber cord that varies in resistance as it’s stretched. Because it varies in resistance, an electric current passed through can detect the amount of stretched applied to the cord.
Typical cost of a stretch sensor: $5 – $15 for non-industrial use. An example for Arduino can be found here.
Due to the configurable length, a stretch sensor must be used in another circuit (e.g. a voltage divider) before being connected to the analog input of the Arduino (so the Arduino can measure the voltage). The example I linked above has a tutorial on how to do this.
Flex
A flex sensor measures the degree of flex or bend in the sensor material. Flex sensors can be useful in developing electronic gloves, robotics, or in manufacturing settings.
Flex sensors work by increasing or decreasing the resistance of the material proportional to the amount of flex or bend in the material.
Typical cost of a flex sensor: $15 – $25. An example can be found here.
The voltage drop through the flex sensor must be measured, similar to the stretch sensor. This means it should be connected through another circuit (e.g. voltage divider) before being connected to the Arduino’s analog pin.
Torque
Torque sensors measure the amount of rotational force being applied. There are mainly two types of torque sensors:
- Rotary torque sensors, which rotate in-line attached to the shaft and are useful for engines, motors, and similar spinning shafts; and
- Reaction torque sensors, which is fixed in place and measures the torque against it.
Torque sensors work by using a material which increases electrical resistance when it’s stretched, and decreases electrical resistance when it’s compressed. The sensor measures this increase and decrease in resistance.
Typical costs of torque sensors are $15 – $1000+.
Cheaper torque sensors typically connect to the analog pin on the Arduino, whereas the more expensive ones will likely offer a digital interface (e.g. SPI).
Tension
Tension sensors measure the tension on a piece of wire, string, ribbon, yarn, belt, or other similar object. They are used in any machine where keeping these connectors taut is important.
Tension sensors work by having a piezoelectric element mounted on a flexible beam. The beam transfers the tension of the wire, string, belt, etc. to the element which generates a voltage output from the sensor.
Typical costs for tension sensors: $10 – $100.
Tension sensors typically connect using the analog interface, though there appear to be digital options available (using SPI).
Sound
A sound sensor detects the presence and volume of sound. It differs from a microphone in that a sound sensor can measure the intensity of sound without being biased to the frequency range of human hearing. This can be particularly noticeable at higher and lower frequencies.
Sound sensors can also be used for measuring distance to an object (see Distance sensor below).
Sound sensors are essentially microphones with a different frequency response profile. They work the same way as microphones by translating vibrations into voltage differences.
Typical cost of a sound sensor: $5 – $20. An example can be found here.
Sound sensors can connect to the analog input on an Arduino, or to digital communication pins, such as SPI.
Acceleration
An acceleration sensor, or accelerometer, measures the change in speed of the device. Accelerometers are typically used in getting an understanding of speed (by measuring how much a device has accelerated, you can figure out the speed), or whether an object is falling (useful for hard drive protection).
The change in speed can be measured along a number of directions, such as up/down, left/right, forwards/back, and tilting as well.
Accelerometers typically work by having a small spring mounted surface which can be used to measure the force as the device is accelerated.
Typical cost for accelerometers: $5 – $30. An example can be found here.
Motion
Motion sensors detect when there is movement in the area they are monitoring for motion. This can be useful for motion activated lights or appliances, motion activated cameras, burglar alarms etc. The motion can be detected in a beam area, or in a room.
Motion sensors are typically either sound-based (ultrasonic) or light-based (infrared). Ultrasonic sensors are usually better at detecting motion in a specific area as the beam of sound can be quite narrow. Infrared motion sensors can detect movement over a wider area, such as a room, as the infrared light is spread around the area before being detected; infrared sensors have a tendency for more ‘false positives’ of movement detection.
Typical cost of motion sensors: $5 – $10. Ultrasonic sensors are a little more expensive. Example of ultrasonic here and infrared here.
Connection to Arduino is typically by using the analog pin, which may require other circuit components (e.g. resistors) to work.
Distance
Distance sensors measure the distance from the sensor to another object. They can also be used to measure motion of that object. Distance sensors can be useful for ensuring robots do not collide with other objects, to assist with parking a car, and also as a general-purpose proximity or motion sensor.
Distance sensors are typically based on sound (ultrasonic), or light (laser or infrared). The sensor transmits sound or light which bounces off the object before returning to the sensor. The sensor is able to use characteristics of the return wave to figure out how far the object is. Motion is sensed if this distance changes.
The cost of distance sensors varies from about $5 to $30 for Arduino uses (they can go into the thousands of dollars for very accurate long distance sensors). Higher accuracy and longer distance are usually at the expensive end; I didn’t see much difference in the price range between light-based and sound-based sensors. An example of a light-based distance sensor can be found here, and a sound-based sensor here.
Connection to an Arduino is typically accomplished via the analog pin, with the voltage proportional to the distance measured.
Vibration
Vibration sensors detect how much force is changing on the sensor due to vibration. Vibration can often damage machines and electronics (and even people), and vibration sensors are an important tool in figuring out when this vibration becomes too much.
Vibration sensors work by having a thin piezoelectric film that generates a voltage as it vibrates.
Typical cost of vibration sensors are around $5 to $20 for Arduino uses (vibration sensors for industrial use can cost thousands). An example vibration sensor suitable for Arduino can be found here.
Vibration sensors typically offer an analog voltage signal corresponding to the intensity of the vibration. The sensor can be connected to the analog pin on an Arduino, however additional circuitry (e.g. voltage divider) may be needed.
Chris once took a whole university subject called Principles and Applications of Sensors. Despite being part of an electrical engineering degree, this subject was run by the physics faculty.