Setting up a Raspberry Pi to host an SQL database can be difficult. This guide looks at useful and popular databases you can install on a Raspberry Pi, and how to get started using them. I’ve included 5 different SQL databases in this guide, including free and open-source ones (e.g. SQLite) and more proprietary databases (e.g. Microsoft SQL server).
The easiest SQL database to install on Raspberry Pi is SQLite. It is compatible with most Raspberry Pi operating systems and can be installed simply from the command line. Graphical interface tools are also available for SQLite.
I found SQLite to be the best overall SQL database for Raspberry Pi (possibly best database overall). It’s easy to install, simple to use, well supported amongst the community, and has simple graphical tools available to interact with it. If you want to host a website from a Raspberry Pi, MariaDB is another option (also included in this guide).
SQLite
SQLite is a small, efficient, and easy to use SQL database. It works well on phones, embedded computers, automobiles, and other applications where there may not be much CPU power available. This is what makes it great for Raspberry Pi.
SQLite on Raspberry Pi is great for:
- A quick way to automate storing data in a table format
- When your Raspberry Pi is acting as a server for other devices
- Learning about SQL and relational databases
SQLite on your Raspberry Pi can be used from popular programming languages (Python, R, JavaScript, C). Visual tools are also available that allow you to add and edit data without any programming (see below). I tested the visual tools and SQLite itself using the Raspberry Pi OS and Ubuntu for Raspberry Pi and both worked well.
SQLite is easy to install on Raspberry Pi, follow these three steps:
Step 1 – Open the Terminal
Step 2 – Ensure you have the most up-to-date list of software packages for the operating system:
sudo apt updateStep 3 – Install SQLite:
sudo apt install sqlite3The 3 at the end means you will get the latest version of the third SQLite.
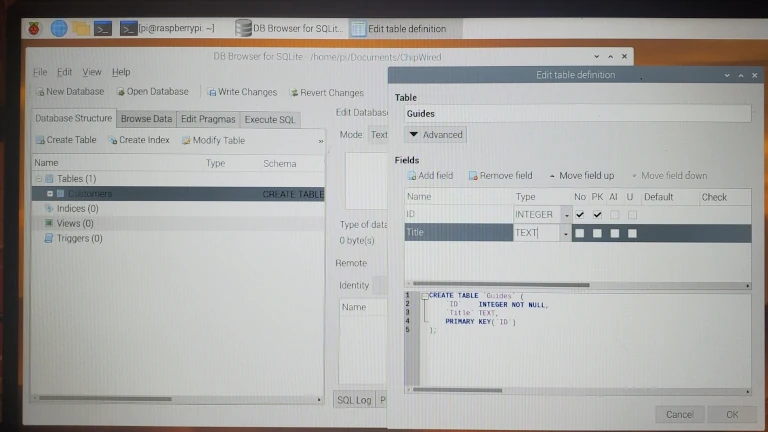
I also like to install a more visual tool to work with databases (that way I can see the tables, and see what my SQL is doing). For SQLite, I found a good visual tool to be DB Browser for SQLite.
To install DB Browser, use the following command:
sudo apt install sqlitebrowserMany programming languages are also compatible with SQLite. Once SQLite is running on your Raspberry Pi, it can be accessed using the relevant library/package for whichever programming language your app is written in. The table below lists the library/package to include to connect a language to SQLite:
| Language | Library or Package |
|---|---|
| Python | import sqlite3 |
| JavaScript | var sqlite3 = require('sqlite3'); |
| Java | Use the SQLite JDBC driver (found here) |
| C / C++ | #include <sqlite3.h> |
| R | Install RSQLite then include: library(DBI) |
The official SQLite website can be found here.
Interested in other easy-to-use databases for Raspberry Pi? While SQLite is my favourite SQL database for Raspberry Pi, I do like other databases that run on the Pi (such as TinyDB). I wrote a whole guide to Raspberry Pi databases here: chipwired.com/databases-for-raspberry-pi/
MariaDB
MariaDB is an open source database derived from MySQL. It aims to be a drop-in alternative to MySQL, while remaining free, open source, and community supported.
MariaDB is an alternative to MySQL that works on Raspberry Pi. MySQL is difficult to install on Raspberry Pi as it is not officially supported for 32-bit ARM-based operating systems (which the current version of Raspberry Pi OS is). While it is possible to install MySQL on Raspberry Pi using a 64 bit operating system, MariaDB works natively with Raspberry Pi OS.
I tested MariaDB on Raspberry Pi OS and Ubuntu using my Raspberry Pi 4 and found it works best on Ubuntu. This is mostly because I wanted to use a graphical interface for the database, and 64 bit Ubuntu supported Beekeeper Studio while the 32 bit Raspberry Pi OS did not.
Raspberry Pi 3 should be able to run MariaDB similarly using a 64 bit operating system, while earlier models of Raspberry Pi will have to stick to the 32 bit version.
To install MariaDB, follow these 5 steps:
Step 1 – Open the terminal
Step 2 – Ensure you have the most up to date packages for the operating system:
sudo apt updateStep 3 – Install MariaDB:
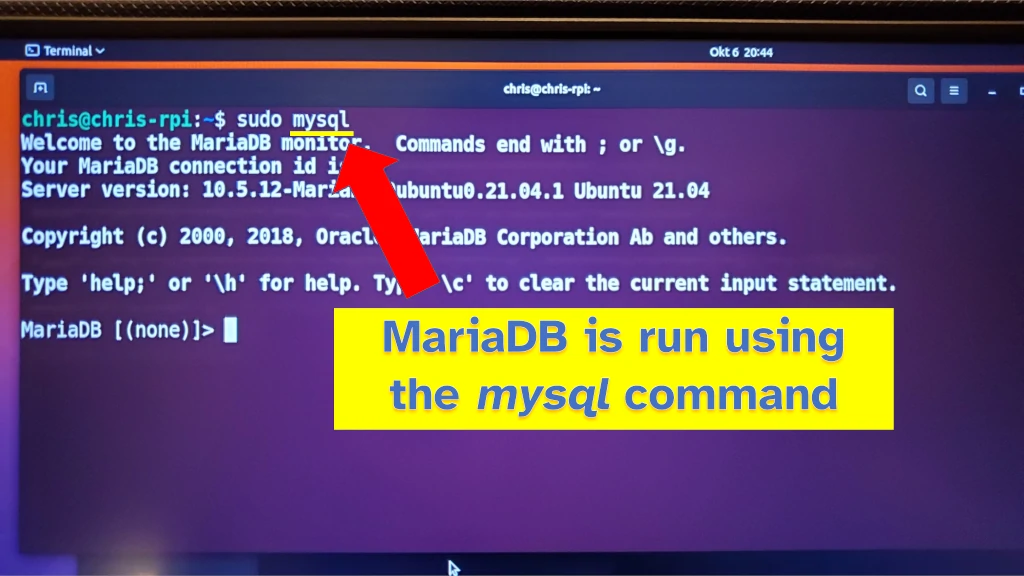
sudo apt install mariadb-serverStep 4 – Login to MariaDB (we need to create a user):
sudo mysql -u rootThis is not a mistake – MariaDB is run using the command mysql
Step 5 – Create a user that we can use in our other apps (note the semicolon at the end of the command and the single quotes):
CREATE USER chris identified by 'secretpassword';That should be enough to get the basics of MariaDB working. To use it properly from here we’d have to setup tables and actually add some data. I’ve found a graphical tool to be the easiest way to do this (since I’m not planning on putting the Raspberry Pi into production or anything).
Installing a graphical tool to work with MariaDB I found to be a little harder. I chose a better looking tool that had more steps (rather than one that didn’t look as good but was easy to install).
To install Beekeeper Studio to view your database, follow these steps:
Step 1 – Add their security key to your operating system:
wget --quiet -O - https://deb.beekeeperstudio.io/beekeeper.key | sudo apt-key add -Step 2 – Add their repository to your list of repositories:
echo "deb https://deb.beekeeperstudio.io stable main" | sudo tee /etc/apt/sources.list.d/beekeeper-studio-app.listStep 3 – Update your repository list:
sudo apt updateStep 4 – Install Beekeeper Studio:
sudo apt install beekeeper-studioI took all these steps from their website here. Following them allowed me to install Beekeeper Studio on my Raspberry Pi 4 running Ubuntu (64 bit). I found that Beekeeper Studio would not work on Raspberry Pi OS because you likely have the 32bit version installed. At the time of writing this article, the 64 bit version of Raspberry Pi OS is months away, though when it arrives it’ll likely support Beekeeper Studio.
To run Beekeeper Studio after installing, look for it in the list of apps (I tried to run it from the Terminal and couldn’t figure that out).
PostgreSQL
PostgreSQL is an advanced, free, and open source database which is incredibly popular. It is designed to handle large complicated workloads quickly and efficiently.
PostgreSQL runs on Raspberry Pi. It requires a 64 bit operating system, such as Ubuntu for Raspberry Pi. Installation is straightforward using the apt package manager, however a setup is required when it is first run.
To install PostreSQL on Raspberry Pi, follow these steps:
Step 1 – Open the terminal
Step 2 – Ensure you have the most up to date packages for the operating system:
sudo apt updateStep 3 – Install PostgreSQL:
sudo apt install postgresql-13Note that 13 was the number that was available on my Raspberry Pi Ubuntu at the time of installation. On the PostgreSQL website it says to use 12 (which wasn’t available on my Ubuntu).
A new Postgres installation needs to be configured before use. I followed the complete guide here which took me through step by step what needs to be done to initialise a fresh install of Postgres (take note though that the command is CREATE DATABASE rather than what they say on that page).
Firebird
Firebird is another advanced open-source SQL database which works on Ubuntu for Raspberry Pi. Despite the similar name, it is unrelated to the Mozilla Firefox web browser.
The basic steps to install Firebird are the same as for other databases:
- Update packages:
sudo apt update - Install Firebird:
sudo apt-get install firebird3.0-server - Configure the server
- Install a GUI
- Use the database
The guide here on Ubuntu’s website is really helpful and takes you through step-by-step the commands required to install, configure, and then use Firebird.
I didn’t find any advantage of using Firebird over the other databases in this guide. It ticks all the same boxes as MariaDB (free, runs on Raspberry Pi), but seems to have a much smaller community and it felt more difficult to install.
I can’t think of any circumstance to use Firebird on Raspberry Pi. Consider SQLite or MariaDB instead.
Microsoft SQL Express
Microsoft SQL Express is a free version of Microsoft’s SQL server product. It claims to run on 64-bit ARM (the type of processor that Raspberry Pi uses). At the time of writing, it wasn’t available for the version of Ubuntu that I had installed on my Raspberry Pi.
Microsoft offers extensive IoT support through their Azure platform. If you’re building extensive IoT solutions (e.g. industrial applications) with your Raspberry Pi, it might be worth exploring the Microsoft ecosystem. Exploring Azure for Raspberry Pi further is something I’ll cover in another guide.
A handy guide on installing SQL server for Ubuntu (which runs on Raspberry Pi) is available here.
If you’re interested in cloud storage solutions instead, I wrote a guide to some of the common cloud solutions available on Raspberry Pi. Check it out here: chipwired.com/cloud-connections-raspberry-pi
Despite not being a server admin, Chris has worked extensively with databases implementing data collection and analysis tools.