Not all of the popular models of Arduino come with WiFi – that’s a lesson I learnt when I first started out. For my first Arduino project idea, I needed WiFi, and it wasn’t clear to me which Arduino I should buy. After a lot of research I figured it out, and I’ve put this guide together based on that research (and my subsequent experience) to help anyone figure out which Arduino comes with WiFi and how to get started using it.
The following Arduino boards come with WiFi built-in:
- Nano 33 BLE
- Nano 33 IoT
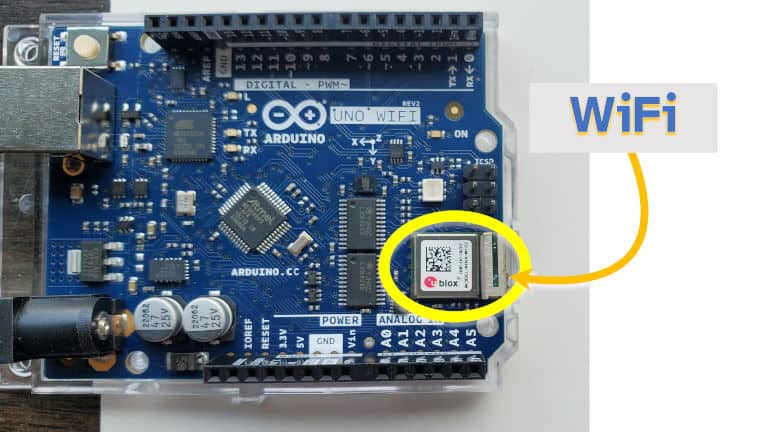
- Uno WiFi Rev 2
- MKR 1000
- MKR WiFi 1010
- MKR Vidor 4000
- Portenta H7
I found the MKR family to be a strong supporter of connectivity, WiFi in particular. This seems to be in-line with their design intent of being for “makers”, IoT applications, sensor networks, cloud connectivity, and similar applications. Particularly if you need more power than the Nano family.
The built-in WiFi supports 802.11 b/g/n and operates at 2.4Ghz. These Arduino can connect to a WiFi network or act as a WiFi access point.
Mega, Due, and other Uno boards do not come with WiFi built in. WiFi can be added to these boards using a shield or via serial/UART communications, which typically cost about $10. I’ve included more detail below on how WiFi can be added to an Arduino.
To identify if an Arduino has WiFi built in, look for the u-blox chip or the ATSAMW25. The u-blox chip is the more common one as the ATSAMW25 is only found on the MKR 1000 (which, for reference, appears to be using an ATWINC1500 to do the WiFi communication).
The WiFiNINA library should be used with the boards listed above, except perhaps the MKR 1000 which uses a different chip (please reach out if you have experience with this board and I’ll update this guide to include the library for the MKR 1000). If adding a WiFi shield, then Arduino’s WiFi library can be used instead.
In this guide I’ve looked at:
- Cost of Arduino boards that have WiFi included
- How to add WiFi to an Arduino (and how much that costs)
- How to use the Arduino WiFi
- Example projects that take advantage of WiFi
How much an Arduino with WiFi Costs
An Arduino with WiFi can cost can cost as little as $18, however the cost can go over $100 depending on other features of the board. For most WiFi-related projects, expect to spend $20 and $45 on an Arduino with WiFi built in.
The table below lists the popular Arduino models that come with WiFi built-in, and how much they typically cost:
| Arduino Model | Typical Cost |
|---|---|
| Nano 33 IoT | $18.40 |
| Nano 33 BLE | $20.20 |
| Nano 33 BLE Sense | $31.10 |
| MKR WiFi 1010 | $32.10 |
| MKR 1000 | $36.80 |
| UNO WiFi Rev 2 | $44.80 |
| MKR Vidor 4000 | $72.40 |
| Portenta H7 | $103.40 |
The cheapest way to get a WiFi connected Arduino is with the Nano 33 IoT. These are small form factor boards great for building wearable devices and gathering data from sensors.
The MKR WiFi 1010 also offers a good value option. It’s positioned as the “pro” version of the Nano 33 and includes a battery charger. Both of these boards operate at 3.3V which means that work-arounds may be required to use 5V shields with these boards. I wouldn’t recommend the MKR 1000, it’s more expensive and uses a different WiFi chip that doesn’t come with Bluetooth either.
The UNO WiFi Rev 2 is great for beginners looking to learn about Arduino. It has wide compatibility with Arduino shields (it operates at 5V), and there are a lot of example projects out there for getting started. This is the board I started with.
Other popular Arduino boards, such as the Mega family and the Due, do not come with WiFi included. In the next section of this guide I’ve gone in to more detail on how to add WiFi to an Arduino which doesn’t already come with it.
If you’re looking for the best Arduino for beginners, check out my guide where I compared all the beginner Arduino models based on their costs and how easy it is to get started: chipwired.com/best-arduino-for-beginners/
How to Add WiFi to an Arduino
Third party WiFi shields compatible with Arduino typically cost between $10 and $20. These shields are typically based on the ESP8266 WiFi chipset packaged to be compatible with Arduino. An example of this is the Sparkfun one I found here. I couldn’t find an official WiFi shield on Arduino’s website, even though they discuss the shield extensively here. It seems Arduino used to make their own WiFi shield and now no longer do.
To add WiFi to an Arduino:
- Connect the shield using headers (these may require soldering if not included already)
- Include the relevant library in the sketch
- Add code to connect to the WiFi
- Compile, upload and test
Relevant libraries will depend on the instructions from the supplier of the shield. The ones I found typically involved including a new library specific for that shield (e.g. the SparkFun ESP8266 library for the SparkFun WiFi shield) and then following the documentation for that library to connect to WiFi.
I’ve included some examples below on how to code a WiFi sketch using the various libraries available.
How to Use WiFi on an Arduino
After adding WiFi to an Arduino, these are typically the steps to set it up:
- Check firmware version using the IDE
- Update firmware with the Firmware Updater tool
- Load an example sketch and modify the code
If using a third-party WiFi shield or serial WiFi board, these steps will vary slightly. The instructions that came with the shield/board should give some details as to how to go about setting it up.
The WiFiNINA firmware updater seemed unreliable when I tried to use it. Occasionally it would claim my Arduino wasn’t connected, but without my changing anything, it would start working again.
The following functions are the typical process I go through when using WiFi on an Arduino:
| Task | Useful Functions |
|---|---|
| To start a client connection (Arduino reads from another computer) | begin() starts the WiFi connection and returns a status if connected to a network. Parameters include the SSID, password, or WEP details (if using WEP).WiFiClient() creates the client that can be used to talk to a server (locally or over the internet). Use this one if you started the connection with begin(). Once connected to a server, you can issue it commands with println() and read the results with read(). |
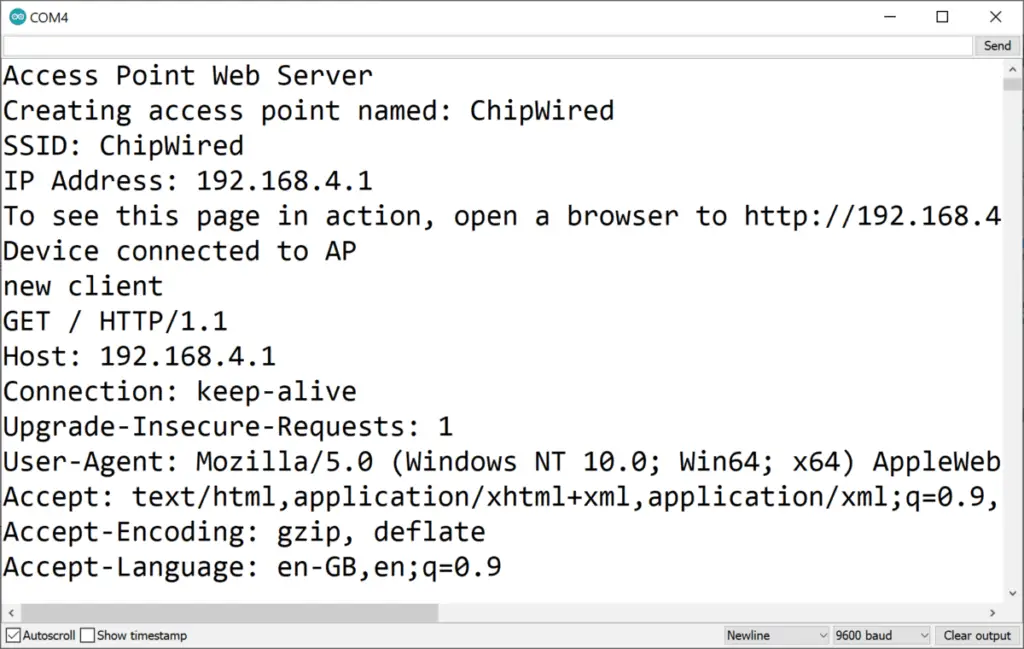
| To start a server for other devices to connect to (other computers can receive data from Arduino) | beginAP() starts the Access Point mode allowing other devices/computers to connect using WiFi broadcast from the Arduino. Parameters include the SSID, password, and channel number (if applicable).WiFiServer() creates the server that can serve data to clients connected via the WiFi (locally, or if your WiFi Access Point allows, over the internet). Use this one with the beginAP() function. Once a client connects to the Arduino, you can issue it commands with println() and read its requests with read(). |
Full sketch examples and instructions on how to use can be found on Arduino’s website here.
WiFi Project Examples
Some interesting WiFi project examples I’ve found:
- Send an Arduino message to a message to Discord: Send a Message on Discord – Arduino Project Hub
- Tweeting from an Arduino keypad: Tweet using Arduino, ESP and Keypad – Arduino Project Hub
- Using the internet to keep an accurate clock: Self-Setting Super Accurate Clocks – Arduino Project Hub