Which components should be purchased when getting started with Arduino. This was a tough question that I had to figure out for myself when I first started building projects with Arduino. This guide aims to give you a list of the common components that are useful in many different Arduino projects, so that you have a reference you can use when purchasing your own. These are the components I wish I’d known to purchase when I first started out with Arduino.
A summary of the typical costs involved with common components are listed in the table below (scroll down for the complete guide):
| Component | Cost |
|---|---|
| Display (LED or LCD) | $2 – $13 |
| LED (bundle) | $1 – $2 |
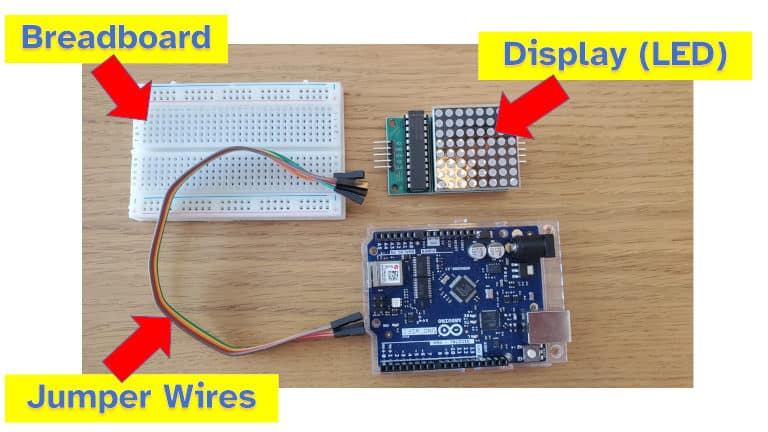
| Breadboard (small) | $5 |
| Wires (small bundle) | $3 |
| Temperature sensor | $2 |
| Small motor | $2 |
I’ve grouped the components into three broad categories:
- Ways to get information out of your Arduino (displays, LEDs)
- Ways to work with your Arduino (wires, cables, breadboards)
- Ways to have your Arduino do something (collect data with sensors, control motors, or control relays)
1. LED or LCD Display
An LED or LCD display is one of the easiest ways to get information out of your Arduino. A sketch with appropriate library included can be used to display messages, readings, data, or other information about what your Arduino is doing and what information it is receiving.
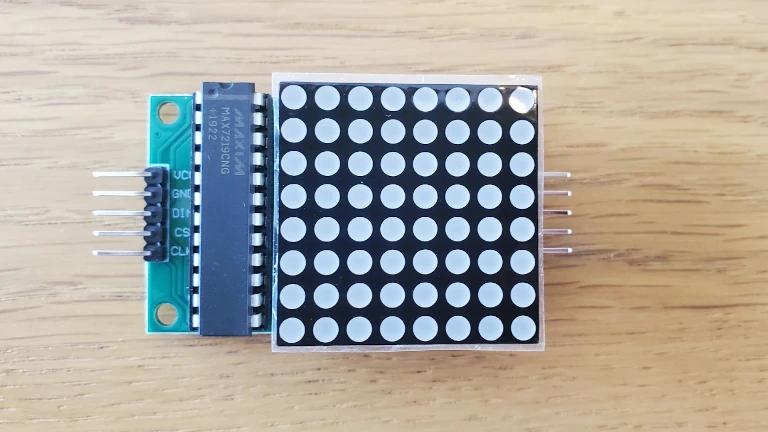
LED displays useful for Arduino projects (the segment style ones) typically cost roughly $1 per character. For LCD displays typically used in Arduino projects, expect to spend between $3 and $13. These prices come from Jameco, one of the online shops I recommend for buying Arduino components – check out my guide for more details here: chipwired.com/arduino-component-shops/
| Part | Cost |
|---|---|
| 1 row with 8 character LCD display | $3 to $5 |
| 4 rows with 16 character LCD display | $7 to $13 |
| 2 digit LED display | $2 |
Displays are useful in projects which:
- Display readings on the Arduino itself
- Display status information about the Arduino
- Need to show error information if something isn’t working
If you don’t have an LED or LCD display, consider using the Serial Monitor in the Arduino IDE to read data from your Arduino (after you’ve included the appropriate functions from a sketch).
2. LEDs
LEDs – the individual ones – are a simple way for an Arduino sketch to communicate to the outside world. An LED can be turned on or off by code in an Arduino sketch. Every Arduino I’ve seen comes with at least 1 LED built in (though these are already soldered to the board).
Costs for through-hole LEDs that are used in Arduino projects are $1 to $2 for a bundle of 10-20. If you buy a few hundred, the cost per LED is a lot cheaper. There are often a generous number of LEDs included in Arduino starter kits.
LEDs are useful for:
- Showing the current state of a sketch
- Blinking to show that the Arduino is still alive and processing things
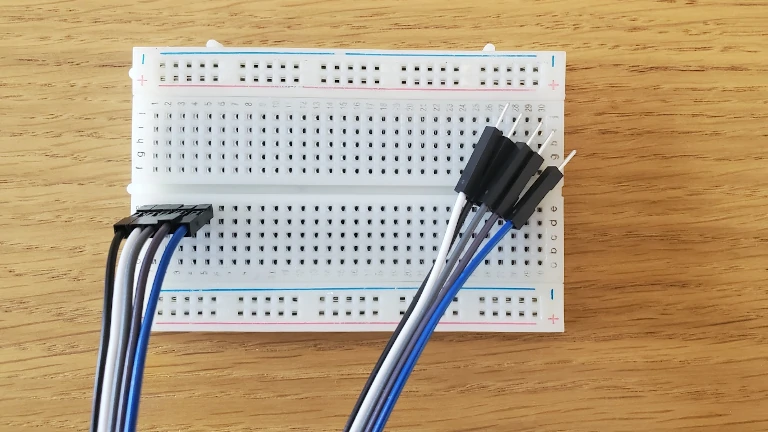
3. Breadboard
Breadboards are a surface which you can plug components into to form circuits. A breadboard provides a base of connectivity to which components are connected and those circuits are formed.
The cost of breadboards typically ranges from $5 to $35 depending on how big the breadboard is. A smaller 400 “point” breadboard is sufficient for most Arduino projects and costs around $5.
Breadboards are useful for:
- Experimenting with circuit design
- Validating the inputs and outputs of a sketch
- Finding bugs in your project
Every Arduino project that uses external circuitry will benefit from getting started on a breadboard.
4. Wires
Wires are used to connect components as part of a circuit. Typically jumper wires are used in conjunction with breadboards to prototype and experiment with an Arduino circuit.

Wires are a great tool to help experiment with circuit design in an early prototype phase of your project. If you ever look to manufacture your project (I wrote a guide on how to make money with Arduino here), you’ll find that wires aren’t often used. This is because most circuits can be instead made with PCB which has components soldered onto it. Most Arduino projects however go through a stage where wires on a breadboard are really useful.
The cost for a bundle of jumper wires is typically $3 – $6 depending on how many are in a bundle. You can also buy a reel of wire and cut your own for much less (though if you’re just getting started you’ll have to buy the side cutters as well). Look for 24 AWG wire if buying your own reel.
5. Cables
I didn’t realise I needed to buy cables when I first purchased an Arduino. My first Arduino came in a little box with nothing else inside (I didn’t buy a starter kit).
Cables differ from wires in that cables are typically a bundle of wires with common connectors on the ends. Cables are designed to support a specific function (e.g. USB, or power) whereas wires can be used general purpose in circuits.
Typical cables to be used in Arduino projects, and their costs, are included in the table below:
| Cable type | Cost |
|---|---|
| USB Type B | $3 to $5 |
| USB Type B micro | $3 to $5 |
| Power cable (including adapter) | $9 to $10 |
I wrote a whole guide to the costs and uses of various cables with Arduino (including when you need them), check out that guide here: chipwired.com/arduino-cables-and-wires/
6. Sensors
Many Arduino projects involve the collection of data from sensors. Data which is then stored on the Arduino, transmitted elsewhere to be stored, or acted upon by the Arduino.
Sensors therefore are a very common component in many Arduino projects. There are a huge variety of sensors that can interface with an Arduino, some examples (and their prices) are included in the table below:
| Sensor | Cost |
|---|---|
| Temperature | $0.50 to $2 |
| Current or voltage | $2 to $9 |
| Soil moisture | $5 |
| Light | $2 |
| Tilt | $2 |
If you want to use sensors in an Arduino project, check these out:
- My huge guide to over 20 sensors that can be used with Arduino: chipwired.com/arduino-sensors-uses-costs-connections/
- A price guide I wrote comparing the popular shops for Arduino components: chipwired.com/arduino-component-shops/
7. Motors
Motors are used in a lot of Arduino projects, such as robotics, CNC machines, and some 3D printers. These are often small 6V or 9V DC motors which can be controlled via the Arduino’s PWM (pulse width modulated) output.
Motors are useful for:
- Controlling other tools (such as in a CNC machine)
- Turning wheels and gears (such as building a robot)
Motors can also be controlled by using a dedicated motor shield. These are particularly useful if controlling multiple motors as the shield helps to supply enough current to run the motors.
A motor shield typically costs between $20 and $25, while the motors themselves cost $2 to $5 each.
8. Relays
Relays can be used as a way for your Arduino to control other circuits, or they can be read by the Arduino to understand the state of something physical.
A relay can represent an output from the Arduino (i.e. using the Arduino to control something) or an input to the Arduino (i.e. using the Arduino to read the state of something else). Relays are a great way to use the Arduino to control a higher current circuit, such as using an Arduino to switch lights on or off.
Relays are useful for:
- Switching another circuit, particularly where that circuit uses a high current (such as light switches)
- Providing an electrically isolated control interface between two circuits
- Reading the state of another circuit
Small relays can be purchased as part of a shield for roughly $16 for 4 relays capable of switching 240V circuits, such as for lighting a room. Individual relays can be purchased for anything from a couple of dollars all the way up to hundreds of dollars depending on what you need them to do.
Next Step
Arduino projects often include instructions on which components are requires, and in what quantity those components will be used. Oftentimes similar components can be substituted if not available, this is where some experimentation might be required (a benefit of using breadboards to test out circuits).
If you need help figuring out where to buy components online, I put a guide together that looks at the best places to buy components in the US or in the UK. Check out the guide here: chipwired.com/arduino-component-shops/
Chris has been building electronics projects since he was 16. The first one he presented in public was a “three penny radio”, which consisted of 3 small coins, a transistor, a speaker, and a few other components which were all used to pick up an AM radio signal.